

To get peak performance, start by preparing and securing every part—assemble the housing, auger, basket, and feed chute, then attach the spout and pulp container. Feed washed produce in small bursts, using the pusher to guide it down without forcing. After juicing, disassemble and clean the pulp filter, screen, and blades, rinse thoroughly, and dry completely before reassembling. Store parts dry and ready. With proper upkeep, you’ll master every component—from pulp filter to spout—seamlessly.
Understanding the Pulp Filter

The pulp filter sits inside the strainer basket, catching larger bits while the juice slips through. You’ll find it’s usually a stainless steel mesh, designed to separate pulp from the juice efficiently. Located right where the strainer meets the basket, it’s your first line of defense against chunky final drinks.
When you juice, you’ll notice pulp collects on the filter, and liquid passes through. After you finish, the filter can get clogged, so you rinse or brush it to restore smooth flow. Regular cleaning with a soft brush preserves mesh integrity and keeps extraction steady.
Some pulp filters are removable and dishwasher-safe, making maintenance quicker and extending your juicer’s lifespan. Remember: keep the filter clean, keep the pulp independent, keep the juice riding clean.
Preparing the Juice Feed Chute
You’ve already got the hang of the pulp filter, so now turn to the juice feed chute. This is the opening where your produce enters, and its size varies by model, so check what yours can handle.
Before you juice, wash and cut fruits and veggies into pieces that won’t clog the path. Use the pusher to guide ingredients through the feed chute—don’t force or overload it.
Keep the chute clear of debris and pulp by rinsing it right after you finish.
Make sure the chute is properly attached and secured to the juicer housing before you turn the machine on.
With the feed chute prepped, you’re set for steady, smooth juicing and fewer interruptions.


Securing the Paper Filter for Easy Cleanup
You’ll start by lining the mesh strainer with a paper filter so pulp stays out of your blades and cleanup is a breeze. Secure the filter inside the basket, then use a little water to press it into place if it shifts.
When you’re done, replace the filter after a few uses and rinse the strainer right away for an easy post-juice cleanup.
Paper Filter Setup
Curious how to keep pulp out of every pour? Here’s the quick setup: unfold the paper filter carefully and place it inside the mesh strainer basket before you assemble. Make sure the paper lies flat and snug against the mesh, covering the pulp exit area to catch fine pulp particles.
Secure the paper filter by attaching the strainer basket firmly into the juicer housing, so it won’t shift during operation. Use a damp cloth to smooth out any wrinkles or folds, ensuring even coverage for ideal filtering.
After juicing, gently remove the paper filter and discard or rinse it for easy cleanup, preventing pulp buildup on the strainer. This keeps performance steady and cleanup simple.
Easy Cleanup Techniques
Securing the paper filter tightly in the strainer basket is the key to easy cleanup and steady juicing performance. Line the mesh with a paper filter before you start, so pulp stays off the mesh and cleanup is quicker.
When you finish, carefully lift out the paper filter along with the pulp for easy disposal or composting, instead of fishing out bits by hand.
Replacing the paper filter regularly prevents buildup and keeps the juicer operating efficiently, reducing scrubbing time later.
A properly secured filter minimizes residue on the mesh, making cleanup smoother and faster.
This small step—consistent filter use—dramatically cuts post-juice mess, so you can move on to your next batch with minimal downtime and maximum pulp filter efficiency.
Filter Replacement Tips
To keep leaks at bay and cleanup quick, securely attach the paper filter to the mesh by lining it up with the edges before you reassemble. This guarantees a flat, wrinkle-free surface that maximizes pulp and juice separation during operation.
Before you place it in the strainer basket, use a damp cloth or water to gently smooth out any creases for a better fit and easy removal.
Replace the paper filter after each use to maintain ideal filtration and prevent pulp buildup that can clog the mesh.
When finished juicing, carefully peel away the filter from the strainer, discarding or composting it for easy cleanup and maintenance.
Keep the pulp container ready for quick transferring and cleanup during refills. filter replacement, pulp container.
Assembling the Juicer Components
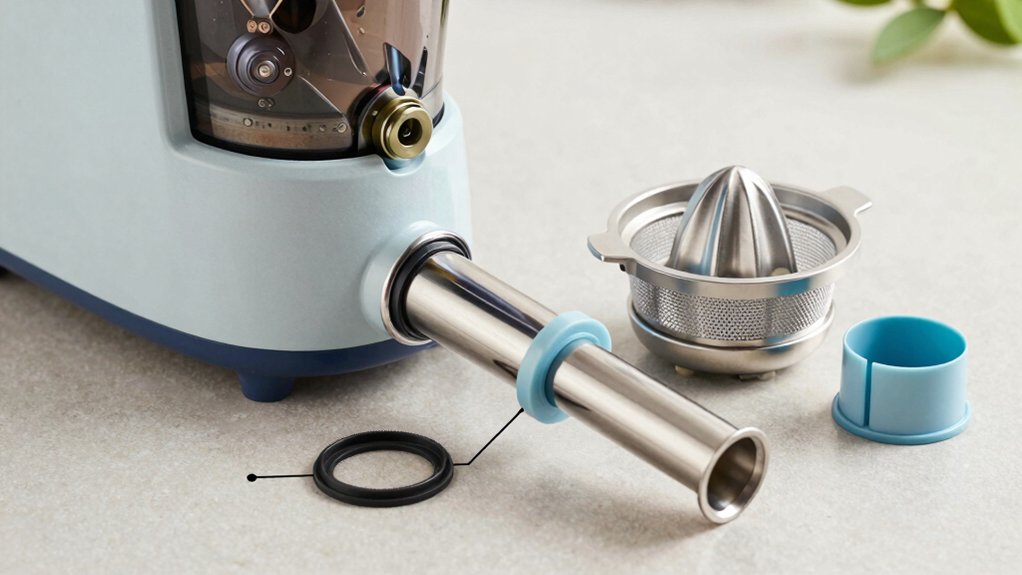
Before you assemble, start by making sure every part—the housing, strainer basket, auger, and feed chute—is clean and dry.
You’ll assemble with purpose, aligning pieces so they click smoothly into place rather than forcing fit.
Attach the motor housing securely to the base, ensuring it sits flush and lines up with the mounting points.
Next, insert the auger into the strainer basket, checking that it fits snugly and rotates freely without obstruction.
Attach the feed chute to the top of the housing, confirming it clicks or locks into place to prevent leaks during operation.
Finally, place the juice spout and pulp collector in their designated positions, verifying they’re firmly attached and aligned for smooth juice flow.
Your juicer is ready to perform. assemble.
Preparing Fruits and Vegetables for Juicing
Washing your fruits and vegetables thoroughly under running water is the first step to fresh juice, removing dirt, pesticides, and bacteria so you get cleaner, better-tasting results.
Once clean, peel citrus fruits like oranges, grapefruits, and pineapples to prevent imbalanced machine operation and reduce bitterness in the juice.
Next, cut large produce into smaller, manageable pieces that fit easily into the feed chute to prevent clogging and ensure efficient processing.
Remove seeds, pits, and thick peels from produce such as apples, cherries, and mangoes to avoid damaging the juicer and affecting flavor.
For leafy greens, chop or tear into smaller pieces to facilitate smoother feeding and better juice extraction.
In short, prepare thoughtfully to maximize yield from every fruit and vegetable.
Attaching the Pusher and Feed Chute
You’ll attach the pusher securely and align the feed chute so produce slides in cleanly.
Use the pusher to guide items down firmly but gently, keeping jams at bay and juice flowing smoothly.
Make sure the pusher is clean and dry, and avoid forceful pressing; remove, rinse, and air‑dry after juicing for best results.
Pusher Fitment Guide
Attaching the pusher and feed chute is quick and essential for smooth operation: slide the pusher firmly into the feed chute, aligning it with the chute’s shape so produce feeds cleanly without gaps. You should confirm the pusher fits snugly without forcing, preventing gaps that could cause produce to get stuck or fall back.
Use the pusher to gently press fruits or vegetables downward, helping them engage with the blades or auger effectively. Before operation, check that the pusher’s handle is securely attached and not loose to avoid accidents.
When cleaning, remove the pusher and wash it thoroughly with warm, soapy water to maintain hygiene and proper fit for future use. Maintain consistent pressure and mindful alignment for best performance.
Feed Chute Alignment
Once you’ve got the pusher ready, line up the feed chute with the top of the juicer and click it securely into place to prevent leaks. You’ll want precise alignment between the feed chute and the internal blade or auger, so check it before you power up.
Attach the feed chute firmly, ensuring it locks in place, and verify the pusher fits snugly for safe, efficient pushing of produce. Clean, dry, and dry-fit components perform best, so wipe surfaces and confirm nothing loose.
When assembled, confirm the feed chute and pusher are locked together and aligned to avoid jams and uneven juicing. A secure setup minimizes leaks, promotes steady pressure, and keeps fresh juice flowing smoothly through the system.
Safe Operating Tips
To keep things safe and steady, attach the feed chute firmly to the juicer first, then insert the pusher with steady, gentle pressure. Your goal is a secure setup before you power up, so verify alignment and full assembly to avoid jams or accidents.
Always guarantee the feed chute and pusher are free of debris and properly fitted, ready for action. Use the pusher to gradually press produce into the chute, keeping fingers well away from the blades and moving at a steady, controlled pace.
Don’t force ingredients; gentle guidance yields cleaner juice and fewer clogs. After juicing, remove and inspect components, cleaning them promptly to maintain safe, efficient operation of your juicer immediately and beyond.
Positioning the Juice Spout and Containers
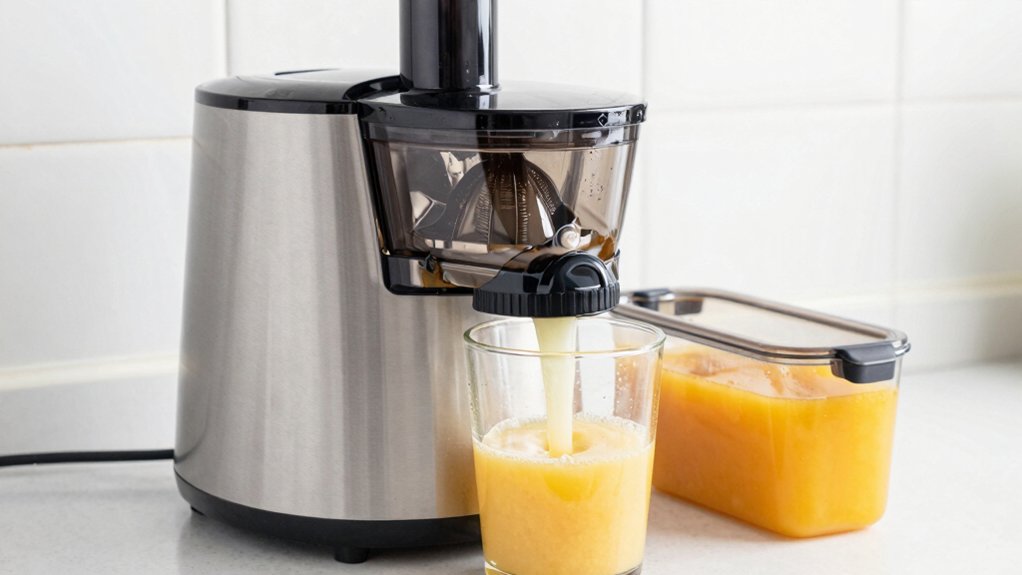
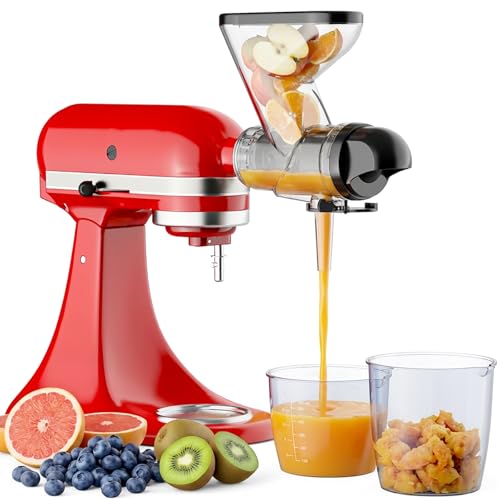
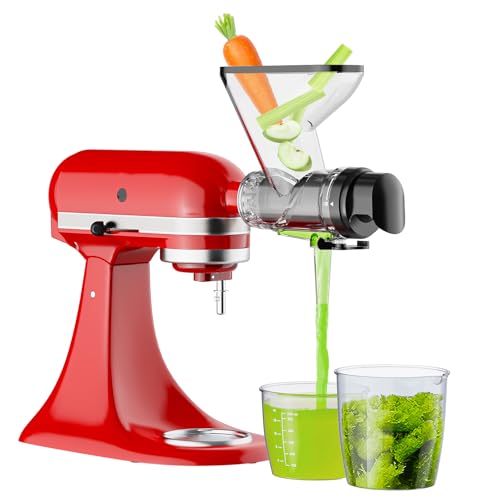
Position the juice spout directly over your collection jar or cup so pours are smooth and spill-free. You’ll keep messes to a minimum by using the adjustable cap on the spout to control drips during and after juicing.
Place a dedicated pulp container under the pulp outlet before starting to catch pulp efficiently and avoid overflow. Make certain the containers are stable and securely positioned to prevent accidental tipping or sliding during operation.
For larger quantities, use a larger jug or pitcher under the spout to collect juice without frequent emptying. Keep the setup tidy by aligning the spout and jars before powering on, and double-check that the containers sit evenly on a flat surface for consistent flow.
Powering On: Safe Startup Procedures
Powering on safely starts with a simple check: make sure the juicer is plugged into a grounded outlet and all parts are properly assembled. You should verify that everything is securely fitted to prevent malfunctions.
Then confirm you’re ready to start feeding produce. Turn on the juicer only when you’re prepared to begin, avoiding accidental operation. Use the power switch or button designated by the manufacturer, typically located on the base or front of the appliance.
Ensure the anti-slip feet are stable and the unit sits on a flat surface so startup is steady. A grounded outlet reduces electrical hazards, and a proper assembly ensures smooth, reliable operation.
When ready, switch it on and begin with controlled, deliberate feeds.
Feeding Produce Through the Chute
Gently feed washed produce into the chute, making sure pieces are small enough to pass easily. You’ll want to insert items in controlled bursts, using the pusher to guide fruits and vegetables down the feed chute with steady pressure—never forcing.
Start the juicer first to prevent jams and guarantee smooth operation from the get-go.
Alternate soft and hard produce so the machine handles each type efficiently, reducing strain on the motor. Don’t overload the chute; feed gradually to maintain consistent juice flow and prevent clogging.
Maintain a steady rhythm, allowing the pulp filter to do its job as solids separate from liquid. Mind the flow, cleaning as you go, and watch for clogs or resistance that signal you’ve pushed too much at once.
Monitoring Pulp and Juice Flow
Have you been watching the flow as you juice? Keep an eye on the pulp collector to prevent overfilling, which can cause pulp back-up and slow your juice flow.
Check the spout for a steady, continuous juice flow without drips or interruptions.
Monitor the mesh strainer for pulp buildup; excessive pulp can clog the filter and reduce extraction speed.
Adjust the feed rate of produce to maintain even juice and pulp flow, avoiding overload that halts the juicer.
Listen for changes in sound or vibrations—these cues may indicate pulp accumulation or flow issues needing immediate attention.
Troubleshooting Common Pulp Buildup
Pulp buildup can stall your juicer and dull the yield, so tackle it before it slows to a crawl. When you notice reduced juice flow, check the mesh filter for fiber clogs and clear them with a quick rinse.
Regularly inspecting and cleaning the mesh strainer during juicing prevents excessive pulp accumulation and keeps airflow steady. If pressure starts to drop, insert the plunger gently to push produce rather than overloading, which minimizes clogs.
For stubborn residues, disassemble and soak the filter in warm, soapy water to loosen buildup and restore performance. If the problem persists, replace worn or damaged filters to maintain ideal pulp filtering and prevent future buildup.
Keep this routine as part of your ongoing maintenance for smooth operation.
Disassembling After Juicing for Cleaning
After you’ve finished juicing, turn off and unplug the machine, then start disassembling by removing the pulp filter, mesh strainer, and auger according to your model’s instructions. Disassembling is your first step to a smooth clean cycle, so handle parts with care to avoid damage.
Rinse each piece immediately after use with warm water to prevent pulp and residue buildup, then set aside for thorough cleaning.
Use a soft brush or sponge to clean the mesh and hard-to-reach areas without scratching or warping components.
Dry all parts thoroughly before reassembling or storing to prevent mold and corrosion.
This careful disassembly sets up easy, effective cleaning later and keeps your juicer ready for the next batch.
Cleaning the Pulp Filter and Spout
After you finish juicing, rinse the pulp filter right away to keep pulp from clogging. Then use a soft brush to clear the tiny mesh holes.
For the spout, give it a quick scrub and soak both parts weekly in warm, soapy water to loosen stubborn residues. Avoid abrasive cleaners that can hurt the mesh.
Dry everything thoroughly before reassembling to prevent mold and corrosion. Keep up preventive care to extend the life of your pulp filter and spout.
Pulp Filter Maintenance
Cleaning the pulp filter and spout is quick and essential: rinse the filter right after juicing to prevent pulp from drying and clogging the mesh, then scrub away buildup with a soft brush to keep the holes clear.
You’ll keep performance high by cleaning the pulp filter regularly. Use a soft brush or toothbrush to gently scrub pulp buildup from the filter’s fine mesh during cleaning. Soaking the pulp filter in warm, soapy water weekly effectively removes residual pulp and helps prevent mold growth.
While you’re at it, check for tears or damage in the filter mesh; replace if you notice holes or frays to maintain best juice quality.
Don’t forget the spout—clean it with a small brush or cloth after each use to prevent residue from hardening and causing blockages.
Spout Cleaning Steps
Spout cleaning is quick and essential: rinse the spout with warm water right after juicing to prevent pulp from sticking and residue drying. Then use a small brush or pipe cleaner to scrub inside and remove any stubborn buildup.
After washing, detach the spout and clean it along with the pulp filter per the manufacturer’s instructions. Soak the spout in warm, soapy water for a few minutes to loosen any remaining pulp, then scrub again if needed.
Rinse thoroughly to remove soap residue, then dry completely before reassembling. Drying prevents mold and corrosion, so use a clean towel or air dry.
When you reattach, ensure a snug, leak-free fit to maintain ideal juice flow and hygiene. Spout cleaning keeps your juicer ready for next use.
Preventive Care Techniques
To keep your juicer performing at its best, start by rinsing the pulp filter immediately after juicing to prevent pulp from drying and hardening, which makes cleaning harder later on.
After rinsing, use a soft brush or toothbrush to gently scrub the pulp filter and spout, removing pulp residue from mesh and crevices without damaging the parts.
Soak the pulp filter and spout in warm, soapy water for a few minutes to loosen stubborn buildup, then rinse thoroughly.
Regularly inspect the filter for tears or damage, and replace it if pulp leaks through or cleaning becomes ineffective.
Dry both components completely with a clean towel or air dry to prevent mold growth and ensure maximum hygiene for future use.
Focus on pulp filter cleaning for lasting performance.
Drying and Reassembling for Storage
After you’ve cleaned all removable parts, dry them thoroughly with a clean towel or air-dry to prevent mold and corrosion. Then reassemble only loosely for storage.
You’ll want the pulp filter, strainer, and blades completely dry before you snap anything back together to avoid rust and keep performance sharp.
Store disassembled components in a designated container or their original packaging so nothing goes missing or gets damaged.
Reassemble the juicer parts loosely or partially to prevent warping or stress on the motor housing during storage.
Keep the unit in a cool, dry place, away from direct sunlight, to preserve material integrity and readiness for next use.
This approach balances protection with quick, hassle-free setup when you’re ready to juice again.


Tips for Maximizing Juice Yield and Longevity
Maximize juice yield and extend your juicer’s life by staying on top of three key habits: keep the pulp filter clean and inspected, vary your produce to optimize extraction, and use smart cleanup tactics.
First, regularly clean and inspect the pulp filter to prevent pulp buildup, which can slash yield by up to 20%.
Second, mix produce with different water contents, like cucumbers and oranges, to boost overall juice extraction.
Third, line the pulp container with a biodegradable bag to simplify cleanup and prevent clogging.
Add ingredients like ginger or herbs to help push produce through and lift output.
Store juice in airtight containers and drink within 24–48 hours to preserve nutrients.
Keep it clean, and pulp and juice stay fresher longer.
Conclusion
Here’s the punchline: you’ve seen how the pulp filter and spout can seem like grunt work, yet they’re the gears that squeeze out maximum flavor. Juicers demand respect and routine, but reward with fresh, vibrant juice. Juicy success lies in simple steps, not secret hacks—prep, assemble, clean, repeat. Juicy payoff meets daily practicality: waste becomes fuel for health, noise becomes routine, and clutter becomes organized efficiency. Use every part, enjoy every drop.