
Table of Contents
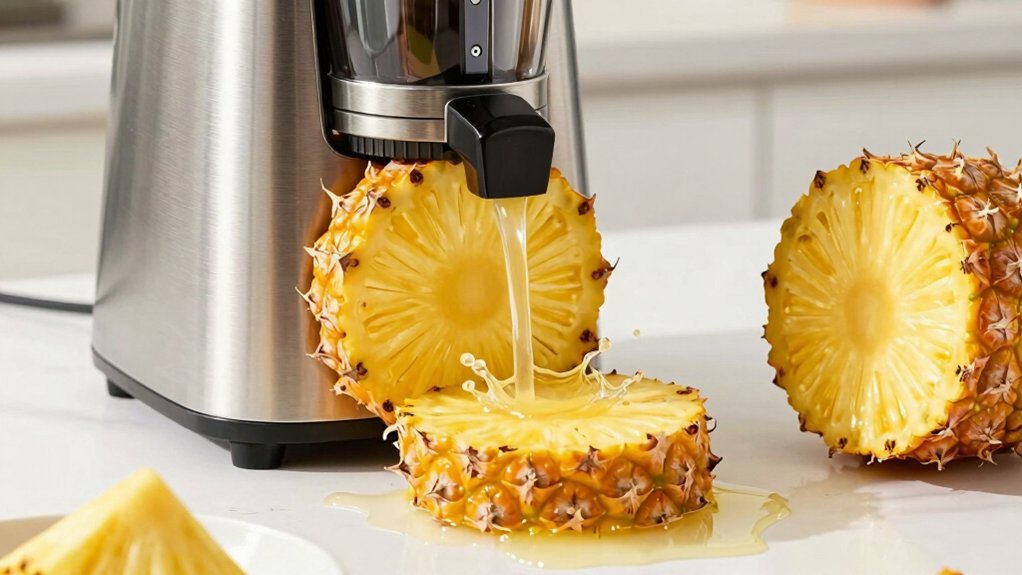
If you’re wondering how to juice pineapple and hoping it’s as simple as chopping it up and shoving it through your juicer, I’ve got good news and slightly annoying news for you. The good news: pineapple is one of the most rewarding fruits to juice, delivering sweet, tropical liquid gold that’s packed with bromelain enzymes and vitamin C. The slightly annoying news: pineapple comes wrapped in spiky armor with a tough core, and if you don’t prep it properly, you’ll either end up with a clogged juicer, bitter-tasting juice from the skin, or you’ll waste half the fruit because you’ve hacked away too much of the good stuff.
To juice pineapple without stringy bits, start by choosing a ripe fruit: yellow with a sweet base aroma, a bit of give, and heavy for its size. Prep carefully: remove the crown and bottom, peel evenly, and cut into ¼–½ inch slices while separating the core. Feed the slices slowly, slicing across fibers to disrupt vertical strands, and cut the core into small ½ inch cubes. After juicing, reverse briefly to clear pulp and keep the flow smooth—more tips await.
Choosing the Perfect Pineapple
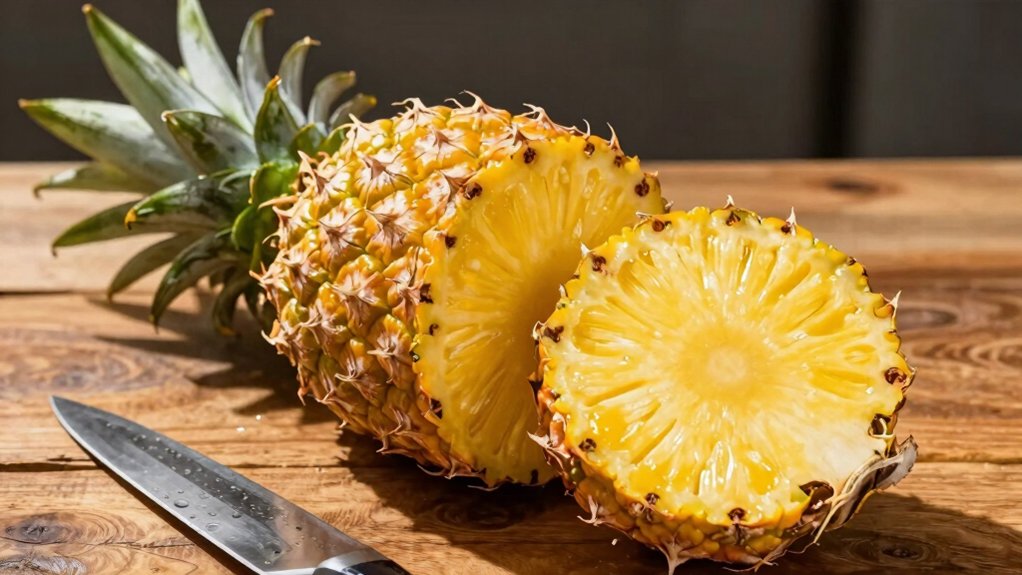
Choosing the perfect pineapple starts with visual and tactile cues. You evaluate ripeness by color: yellow with hints of green signals sweetness, not overripe. You test texture by firmness with a slight give, indicating juiciness and readiness to juice.
You assess weight in your hand; a heavier fruit suggests higher juice content. You confirm aroma at the base; a sweet scent confirms ripeness. You inspect leaves for vibrancy and ease of plucking, which signals freshness.
This combination—color, firmness, weight, aroma, and leaf condition—provides a reliable predictor of juice yield and flavor. You should prioritize pineapples that balance these traits rather than chasing extremes of any single criterion.
What to Look for When Selecting Pineapple
To judge ripeness, look for a vibrant yellow-to-green hue and a fragrant aroma at the base.
Check firmness with a gentle press—yielding slightly indicates ideal juiciness, not mushiness.
Guarantee the leaves are bright green and pluck easily, signaling freshness and full flavor development.
Pineapple Ripeness Guide
Ever wonder how to spot a truly ripe pineapple? In this pineapple ripeness guide, you focus on measurable cues that predict juiciness and flavor.
Look for a vibrant yellow color with green accents, signaling maturity without overripe tones. The fruit should feel heavy for its size, indicating high juice content and freshness. Smell the bottom; a sweet aroma confirms ideal ripeness. Inspect the leaves: green, plump, and easily plucked—these signs point to freshness and readiness.
Avoid dull yellow, brown, or overly soft surfaces, which suggest underripe or overripe conditions. Use these objective checks in sequence to ensure consistency.
This pineapple ripeness guide emphasizes tactile, visual, and olfactory indicators to minimize guesswork and maximize juice yield.
Freshness Signals to Check
Freshness signals guide you to the best pineapple for juicing. When selecting, assess ripeness by color: a bright yellow with green hints signals ideal juicing potential.
The fruit should feel heavy for its size, indicating higher juice content. A sweet aroma at the base confirms flavor readiness.
Check the leaves: vibrant green leaves that pluck out easily indicate freshness and handling quality.
Avoid skins that are dull, brown, or dull yellow, as those signs point to overripe or underripe fruit and potentially poorer juice.
Handle gently to preserve firmness; excessive softness implies loss of juice and quality.
Use these ripeness indicators together for a reliable pick. If all signals align, you’ll maximize juice yield and sweetness in every batch.
What to Avoid to Ensure Freshness
You’ll tighten freshness by avoiding overripe, dull, or fermented pineapples that can dull flavor or clog pulp. Stay away from green, firm fruit and pineapples with dull leaves or a dull appearance, since these signals unripe or aged produce.
Pineapple Freshness Factors
Pineapples with dull yellow or brown skin are overripe and can yield sour juice, so they should be avoided. In evaluating pineapple freshness factors, you should prioritize color, texture, and aroma.
Green, firm pineapples are unripe and lack sweetness, making them less ideal for juicing. A pleasant, tropical scent indicates ripeness; a fermented smell signals spoilage and should be discarded.
Avoid pineapples with dull appearance and a sour or off odor, as these signs point to diminished quality. Overripe fruit often has soft, pulpy flesh that can clog the juicer and reduce juice quality.
Avoiding Freshness Pitfalls
To guarantee peak juice quality, avoid overripe or dull-colored specimens, since soft pulp and a sour aroma signal diminished freshness. You should reject fruit with a fermented or off smell, as spoilage ruins the final product.
Don’t select green pineapples, which are unripe and lack sweetness, compromising juice quality. Skip pineapples with dull, brown, or overly soft appearances, indicating over-ripeness and possible spoilage.
Make certain pineapples are thoroughly cleaned and peeled to prevent introducing bacteria or dirt that can spoil fresh juice. During processing, remove as much remaining pulp inside as possible, and avoid compromisers that introduce fiber or bitterness.
When you extract juice, work with ripe fruit and juice straight, avoiding residues that linger on peels or in tools.
Freshness Conservation Tips
Avoid overripe or underripe fruit, as signs of diminished freshness—dull skin, softness, or firmness extremes—signal reduced flavor and shorter shelf life. To preserve quality, select pineapples with vibrant yellow skin and a firm yet yielding interior. Don’t use green, underripe specimens, which are too firm and lack sweetness, yielding less flavorful juice.
Confirm pineapple peels are cleaned; dirt and bacteria can spoil juice and shorten shelf life. Store juice in an airtight container to minimize air exposure, which accelerates oxidation and spoilage.
Avoid leaving cut pineapple at room temperature for extended periods, as bacterial growth diminishes freshness. When juicing, refrigerate promptly and portion into airtight containers, labeling dates to monitor freshness and prevent waste.



How to Prep Pineapple for Juicing
To prep pineapple for juicing, start by removing the top and bottom, then peel away the skin to expose the yellow flesh.
Next, slice off a thin strip from the outside, no more than ½ inch thick, rotating the fruit to remove the peel evenly.
Cut the pineapple into ¼ to ½ inch slices to break the horizontal fibers for easier juicing.
Slice the core into approximately ½ inch pieces to manage vertical fibers effectively.
Prepare the slices and core cubes separately, depending on your juicer type, to optimize juicing efficiency.
This yields uniform pieces that feed steadily, reducing clogging and preserving juice yield.
When you begin, you’ll notice smoother pineapple juice with fewer stringy bits and a cleaner extraction.
Removing Leaves and Bottom Properly

Starting with the leaves and bottom is the foundation for smooth juicing.
You remove the pineapple leaves by grasping the crown firmly and pulling straight off to avoid fruit damage.
Next, cut off the bottom to create a flat surface, ensuring stability during peeling and slicing.
Use a sharp knife to slice just beneath the leafy crown, removing the top section with leaves attached.
Ensure the leaves are completely detached before peeling to prevent interference with the juicing process.
Begin with a clean cut at the base and top to facilitate even peeling and reduce waste.
When you proceed, align your cuts for clean separation, then set the fruit upright for controlled, efficient peeling and subsequent processing.
This method minimizes stringy remnants and yields consistent juice.
Peeling vs. Keeping the Peel: Pros and Cons
Peeling the pineapple vs. keeping the peel each have clear trade-offs. You weigh cleaner juice and reduced clogging against added fiber, nutrients, and potential residues.
Peeling removes dirt and the fibrous outer layer, yielding a smoother juice and less risk of machine blockage. It also minimizes bitterness from the peel’s compounds.
Keeping the peel boosts fiber and nutrients, but you must ensure thorough cleaning to avoid dirt or residues influencing flavor and safety.
Removing the peel facilitates easier cutting and juicing, particularly on machines sensitive to tough fibers.
Juicing with the peel can impart a bitter or tannic note, reducing immediate drink quality.
Proper peeling therefore supports a smoother, clearer juice with fewer flavor risks, while keeping the peel offers nutritional benefits at the expense of potential bitterness and cleaning demands.
Cutting Techniques to Break Fibers
To optimize juice, you should first apply horizontal cuts to break the cym fibers and reduce clogging.
Then slice the core into ½-inch pieces in the same direction to disrupt vertical fibers for smoother extraction.
Finally, use opposite-direction cuts to target different orientations and minimize stringy residues while maintaining uniform piece size.
Horizontal Fiber Break
Horizontal fiber break involves cutting the pineapple across its vertical fibers to produce smaller, less clogging pieces. You align the blade to cross the grain, then slice horizontally to disrupt long strands. This cross-cutting reduces vertical fiber continuity, ensuring smoother juice flow.
By slicing opposite directions—horizontal for fibers and vertical for flesh—you minimize lingering fiber lengths that can wrap around the juicer. You should also cut the core into ½ inch cubes along the horizontal plane, which helps prevent vertical strands from clogging the machine.
Properly breaking fibers by cross-cutting enhances extraction efficiency and yields a clearer juice. In practice, this method delivers consistent texture, reduces stringy bits, and supports steady throughput without sacrificing yield.
Horizontal fiber break, applied methodically, improves overall juicing performance.
Vertical Fiber Management
Vertical Fiber Management focuses on cutting techniques that proactively break long fibers, preventing jams and promoting steady juice flow. You begin by cutting the pineapple core into ½ inch cubes and slicing the fruit horizontally to break vertical fibers, reducing clogging during juicing.
Slicing in opposite directions targets and fragments the long fibers, improving juice flow and yield. Properly managing vertical fibers by cutting carefully reduces the risk of fibers wrapping around the juicer screw, lowering downtime.
Breaking vertical fibers into smaller pieces allows for smoother juicing, especially with auto feed and manual juicers. Consistently slicing perpendicular to fiber direction ensures easier removal of pulp and cleaner juice extraction.
Aim to minimize resistance, preserve juice quality, and terminate the process with intact vertical fibers minimized at the end.


Core Preparation for Maximum Juice
When preparing the pineapple core for maximum juice, cut it into approximately ½ inch pieces to break vertical fibers and prevent clogging. Then slice horizontally to cut through horizontal fibers and boost yield.
You manage the core by cutting it into smaller cubes, preventing jams and keeping flow steady. Cutting in opposite directions targets different fiber orientations, ensuring more complete extraction of juice.
Properly prepared core pieces allow for smoother insertion into the juicer and prevent clogging during processing. This method reduces stringy bits and concentrates juice yield, supporting efficient juicing.
Precision in size, orientation, and routing of core pieces minimizes resistance, improves throughput, and enhances overall juice quality. Core preparation remains a critical step for consistent pineapple juice yield and texture.
Inserting Pineapple Into a Juicer: Auto Feed
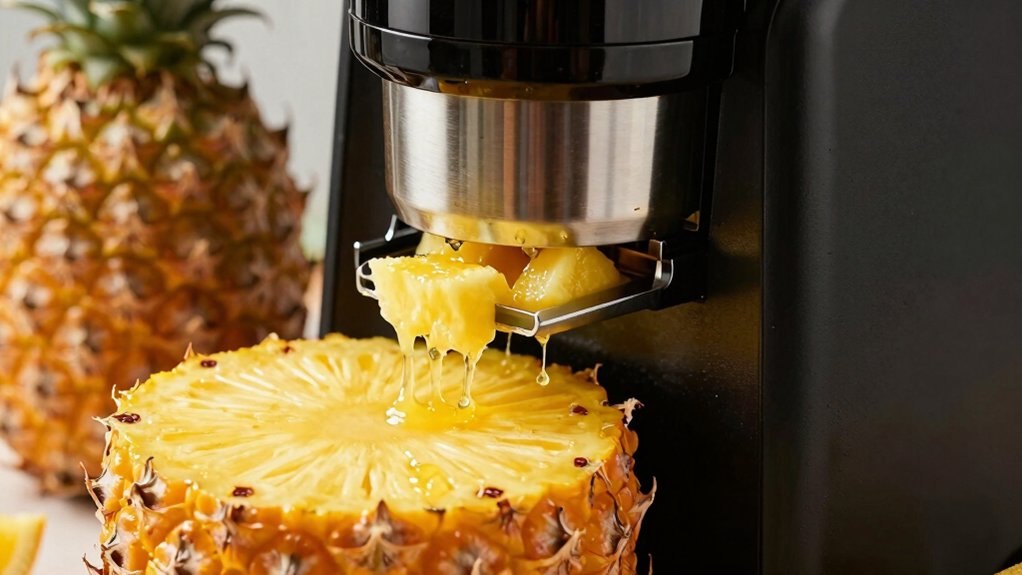
To feed pineapple into an auto feed juicer efficiently, start by placing the slices at the bottom of the feed chute with the core on top to promote even feeding.
You should insert slices slowly, letting the screw pull them downward without forcing them, to maintain a steady flow.
Wait until the pulp stops moving or feeding slows before adding the next slice, preventing jams and preserving operation.
End the process with the core cube to help push out remaining pulp and avoid clogging.
Apply gentle, steady pressure during insertion to maximize juice extraction and maintain consistent flow.
This technique suits a slow juicer, preserving natural sweetness while yielding more juice with controlled auto feed performance.


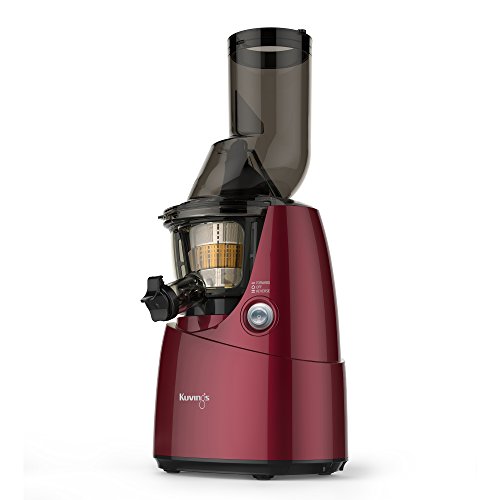
Inserting Pineapple Into a Juicer: REVO830
You’ll start with a slow_insert technique, feeding pineapple slices one at a time to minimize clogging.
Begin with the core-first approach, placing the core on top after the bottom slices to maximize extraction efficiency.
If you pause between pieces, keep the pulp stills, then resume with slice-by-slice insertion to maintain steady flow.
Slow_insert Technique
Slow insertion of pineapple slices into the REVO830 is essential for steady extraction and minimal clogging. You should insert one slice at a time, waiting for the pulp to stop moving before adding the next, to maintain smooth throughput.
Alternate between inserting slices and core cubes to break fibers and reduce blockages, using a gentle, steady pressure to avoid jamming the screw. This slow_insert technique helps prevent clogging and keeps citrus fruits from forcing the mechanism.
After juicing, run the machine in reverse briefly to clear residual pulp and maintain ideal performance. Still keeping a Masticating Juicer approach, this protocol supports stays fresh juice, drink light, and lemon juice consistency, preserving shelf life and making cleanup faster at the end of the session.
Core_First Juicing
Core_First juicing begins with deliberate placement: set pineapple slices at the bottom of the REVO830’s bowl and rest the core cubes on top to encourage steady feeding. You insert slices slowly, allowing the pulp to settle before adding more.
Position the bottom layer to promote a consistent flow, then place core cubes on top to facilitate smooth feeding in the opposite direction. Wait for the pulp to stop moving before adding each new slice to prevent clogging during the juicing process.
Alternate between slices and core cubes as needed, inserting one piece at a time to optimize extraction and reduce fiber buildup. After juicing, use the reverse function briefly to clear remaining pulp and ensure efficient cleaning of the juicer.
Slice-by-Slice Insertion
To insert pineapple slices efficiently, place each piece at the bottom of the REVO830 and feed the core cubes on top to maintain even flow.
You should insert slices slowly, waiting for the pulp to stop moving before adding the next piece.
Position slices at the bottom with the core on top to ensure consistent feeding, then alternate slices and core cubes, especially with larger or tougher pieces.
Apply gentle, steady pressure as you push slices in, preventing clogging while maximizing juice extraction.
Maintain a deliberate rhythm to minimize resistance and ensure uniform pulp processing.
After processing completes, run the juicer in reverse briefly to clear remaining pulp and avoid blockages.
Session pushes help sustain steady throughput and reduce interruptions.
Juicing Technique to Prevent Clogging
To prevent clogging, start by feeding pineapple slices slowly into the juicer so the pulp has time to settle and the machine can process fibers evenly. You maximize Juicing Efficiency by coordinating cuts and flow.
Cut the pineapple and core in opposite directions to break fibers into smaller pieces that are easier to process. Use horizontal cuts for the flesh and vertical cuts for the core to minimize long fibers that can cause blockages.
Avoid overfilling with large chunks; instead, feed smaller pieces gradually to maintain smooth operation. If resistance builds, run the juicer in reverse briefly after processing to clear remaining pulp and prevent buildup.
This disciplined, incremental approach reduces clogs while preserving juice clarity and texture.
Post-Juicing: Clearing the Juicer
After you finish juicing, switch to clearing the machine promptly to prevent residue from hardening and clogging the feed path.
You initiate a reverse cycle for 3–5 seconds to loosen any remaining pulp and clear the feed chute. Then run the juicer for an additional 30 seconds in reverse to ensure all fibers are expelled and the machine is thoroughly cleaned.
Turning off the juicer immediately after reversing prevents unnecessary strain on the motor and prolongs its lifespan.
Use a spatula or brush to remove any pulp buildup around the auger or filter after the reverse cycle. This regular clearing step supports efficient operation and prevents clogging caused by stringy pineapple fibers, reinforcing effective Pulp Management.
Storing Pineapple Juice for Freshness
Storing pineapple juice properly protects flavor and nutrients, so transfer it to an airtight container and seal it immediately after juicing.
You should refrigerate at or below 40°F (4°C) to extend shelf life. Fill the container to the top to minimize air exposure and slow spoilage. Label with the juicing date to monitor freshness and detect signs of fermentation or sourness early.
For ideal taste and nutrient retention, consume the juice within 72 hours of juicing. Keep the container chilled consistently; avoid temperature fluctuations that accelerate degradation.
Oxidation is minimized by airtight sealing, which preserves aroma and sweetness. Regularly inspect for off-odors, unusual coloration, or fizz; discard if any signs appear.
Following these steps yields maximum freshness and accurate shelf life assessment.
Tips for Zero-Waste Juicing With Peels
From the freshness-focused approach you’ve built, zero-waste juicing with peels starts with cleanliness and deliberate processing. Peel sanitation is the cornerstone: thoroughly clean peels under running water with a scrub brush to remove dirt and bacteria before juicing. Removing the peel simplifies operation and reduces the risk of unwanted flavors or contaminants entering your juice.
If you choose to juice with peels, soak them in salt water or a vinegar solution for extra sanitation, then rinse. Use a high-powered juicer or blender to extract juice directly from cleaned peels, maximizing zero-waste use.
Store leftover peels in a sealed bag in the freezer for future flavoring or composting, further reducing waste.
Troubleshooting Common Stringy Bit Issues
Stringy bits in pineapple juice mainly come from long fibers in the core and rind that loosen during juicing. You reduce them by cutting opposite directions to break vertical and horizontal fibers, then slicing into ¼ to ½ inch pieces to shorten fibers and prevent clogging.
Remove the core in small, evenly sliced cubes to ease juice extraction without pulling excessive stringy fibers. Juicing slowly and carefully minimizes fiber buildup, delivering smoother, clearer juice.
If stringiness persists, run the juicer in reverse briefly after processing to help clear remaining fibers and minimize residue. These steps support consistent flavor enhancement, maintaining juice clarity and texture.
Apply them methodically, verifying results with small batch tests before full-scale juicing.
Conclusion
You’ve learned to pick ripe pineapples, avoid overripe ones, and prep with precision. By removing leaves and the bottom cleanly, you minimize stringy bits and maximize juice quality. Post-juicing, a quick clean keeps flavors pure, while proper storage preserves freshness. If peels go to waste, you’ve got a zero-waste path. Think of juicing like a meticulous experiment—each step matters, yielding a smooth result you can taste in every sip. It’s a well-ordered, juicy triumph.