

Table of Contents
Here’s a few tips and tricks on how to clean a masticating juicer, quickly and easily.
Unplug your masticating juicer and prepare a clean workspace. Disassemble safely by removing the feed chute, juicing bowl, auger, and pulp container in measured steps, noting each part’s orientation. Rinse components under warm running water, then scrub the strainer with the included brush and inspect for wear. Dry thoroughly before reassembly, reseating the auger and sealing silicone. Reassemble securely, perform a quick post-clean check, and store in a dry place; full maintenance tips await.
Unplug and Prepare for Cleaning
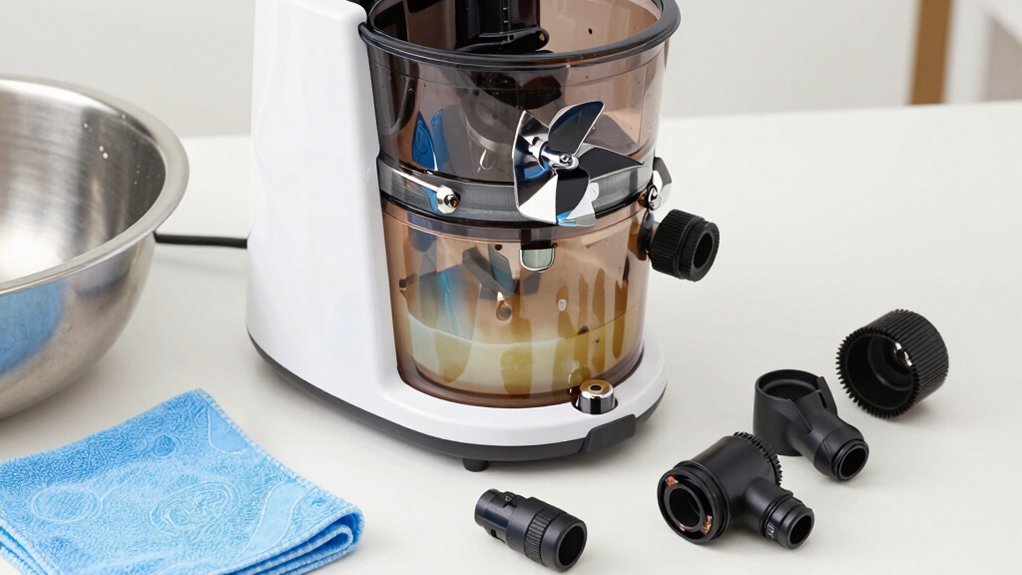
Before you begin disassembly, unplug the juicer from the outlet and wipe the exterior with a damp cloth to remove dust.
You’ll prepare for cleaning by gathering the required tools: a soft brush or cloth, and the manual’s instructions for detachable parts.
Unplug first to guarantee safety, then remove the pulp container, juice spout, and any detachable components per the manual.
With the exterior clean, set aside parts in their designated workspace.
Prepare to document how each piece fits by noting orientation during removal, aiding reassembly.
Keep a tidy area to prevent misplacement.
Verify there’s no residual moisture on electrical components before touching internal assemblies.
Disassemble the Juicer Safely
To disassemble the juicer safely, unplug it and switch it off first. Then follow the manufacturer’s instructions to remove the feed chute, juicing bowl, screw, and pusher.
You disassemble with deliberate, measured steps, ensuring all actions preserve fragile seals and silicone components. Use the provided cleaning brush to gently detach and clean the mesh and internal parts, avoiding excessive force.
Keep parts organized on a clean towel or basin as you go, separating small pieces from larger assemblies. Handle every component with care to prevent damage to seals and o-rings.
Confirm each part is free of juice residue before moving to the next stage. When complete, place all disassembled parts in the prepared area, ready for thorough cleaning and inspection.
Remove the Auger, Strainer, and Pulp Container
To remove the auger, strain the assembly by pulling the auger straight out from the juicing chamber until free of resistance.
Detach the strainer mesh by lifting it gently from the juicing bowl, taking care not to bend or damage the mesh.
Lift the pulp container straight up and away from the base, ensuring you prevent spills and keep parts clean during removal.
Detach Auger Assembly
Detach the auger assembly by unplugging the juicer, removing the pulp container and juice spout, and then turning the auger counterclockwise to free it from the motor shaft.
Lift the auger out of the juicing chamber carefully to avoid damaging internal parts.
Detach the auger assembly by holding the unit steady, then apply a controlled counterclockwise rotation to release engagement with the drive shaft.
Once free, lift the auger straight up, ensuring no contact with the gear train or seals.
Remove the strainer by gently pulling it away from the auger, staying mindful not to bend or stress the mesh.
Finally, lift the pulp container directly upward from the base, confirming all components are separated for thorough cleaning and future reassembly.
This step concludes detaching and preparing the auger for cleaning.
Remove Strainer Mesh
Next, remove the strainer mesh by keeping the juicer unplugged and having already disassembled the pulp container and auger.
Gently lift and detach the strainer from the auger shaft, avoiding any force to prevent damage. Align your grip to avoid bending delicate edges, then set the mesh aside on a clean surface.
Use the provided cleaning brush to scrub the strainer thoroughly, focusing on pulp residue lodged in the tiny holes.
Rinse under warm running water to wash away pulp and debris completely.
Inspect for any glaze buildup or torn sections and address as needed.
After cleaning, carefully reassemble the auger and pulp container, ensuring all parts fit securely for safe operation, then proceed to the next maintenance step: cleaning the housing and seals.
Extract Pulp Container
Carefully detach the pulp container from the juicer’s main body, ensuring it’s completely disengaged before cleaning.
Remove the auger and strainer from the pulp container if their design allows, following the manufacturer’s instructions.
Once separated, inspect each component for pulp remnants and loosened fibers.
Rinse the pulp container, auger, and strainer under warm running water to wash away residual pulp and juices.
Use a soft brush or cleaning tool to scrub any buildup on the interior surfaces and the strainer mesh, paying attention to corners and joints.
Rinse again to remove loosened debris.
Dry all components thoroughly before reassembly to prevent mold.
After drying, reassemble the auger, strainer, and pulp container in the reverse order of disassembly to complete cleaning.
Rinse Each Component Under Running Water
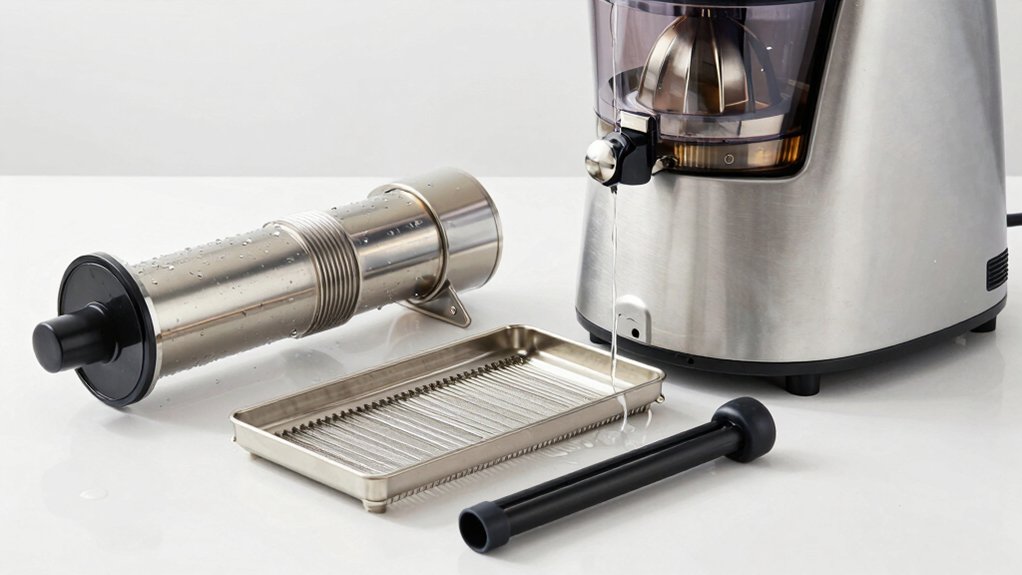
Rinse each component under running water to make sure residual pulp, juice, and small particles that can cause buildup are washed away. Use warm water to loosen dried pulp and prevent clogging of meshes and internal parts.
Hold each part under the tap for 15–20 seconds to ensure all residues are washed away and prevent mold or bacteria growth.
Run Water Thoroughly
After use, run each component under warm, flowing water to loosen and remove pulp before it dries. You rinse each detachable part—the screw, strainer, and pulp container—thoroughly under steady water to prevent pulp buildup.
Use warm water to effectively loosen residual pulp and juice from meshes and crevices, ensuring no debris remains in small passages. Hold components under running water for at least 15-20 seconds to guarantee complete removal of debris and to minimize bacterial growth.
This rinsing step reduces dried pulp residues, making subsequent cleaning easier and faster. Maintain a precise, methodical pace: verify every surface is exposed to water, especially narrow crevices, before proceeding to disassembly or drying.
Consistent rinsing supports overall hygiene and appliance longevity.
Rinse Each Part
Immediately after use, run each disassembled part under warm, running water to prevent pulp from drying and sticking. Rinse each component thoroughly, targeting meshes, the juicing screw, and other assemblies to remove residual pulp and juice.
Use your fingers or a soft brush to dislodge debris from crevices and mesh inner surfaces. Pay special attention to small openings, screw threads, and hard-to-reach areas where pulp tends to accumulate.
Ensure all pieces are rinsed clean, with no visible residue left on surfaces. After rinsing, shake off excess water and set parts aside to dry completely.
Drying fully helps prevent mold and bacterial growth before reassembly. Prioritize a careful, systematic rinse of disassembled parts to maintain juicer hygiene and performance.
Clear Pulp Residue
To prevent pulp from drying and sticking, rinse each disassembled component under warm running water immediately after use. You’ll remove pulp residues with your fingers or a soft brush while you rinse, focusing on mesh surfaces to dislodge particles.
Confirm all pulp and juice traces are washed away from the screw, bowl, and other parts to prevent clogging during the next use. Pay special attention to small crevices and mesh holes where pulp can accumulate; rinse thoroughly until the surfaces feel free of residue.
After rinsing, dry each component completely with a clean towel or allow air drying to prevent mold and bacterial growth. This cleaning process minimizes buildup and prepares parts for reassembly.


Scrub the Strainer With the Included Brush
Start by using the included cleaning brush to scrub the mesh surface of the strainer thoroughly, focusing on pulp lodged in the tiny holes to prevent clogging. You scrub in circular motions to dislodge all debris and ensure even cleaning across the mesh.
Maintain consistent contact with the surface, applying gentle pressure to avoid tearing the mesh while removing lodged particles. After brushing, rinse the strainer under running water immediately to wash away loosened material and verify all pores are clear.
Inspect the mesh for any signs of wear or damage as you rinse, noting areas needing closer attention during future sessions. This step supports regular cleaning and helps you clean the juicer effectively, preserving performance and preventing buildup that could affect juice quality.
Clean the Juicing Screw and Mesh Areas
You scrub the mesh thoroughly with a brush to remove all pulp and debris. Then gently disassemble and soak the mesh parts in warm water with a mild cleaner or vinegar.
Turn the juicing screw upside down to access the interior and clean the compression silicone and inner surfaces, ensuring no residual buildup remains.
Rinse all parts under running water and dry completely before reassembly.
Scrub Mesh Thoroughly
Once you’ve exposed the mesh, scrub both sides with the cleaning brush to remove pulp lodged in the tiny holes. You methodically apply gentle, circular motions to dislodge buildup, focusing on the mesh’s porous surface.
Use the brush to target edges and pockets where pulp clings, ensuring even coverage across both sides. While brushing, turn the juicing screw to access interior surfaces, cleaning any residue clinging to threads or channels.
Rinse the mesh and screw thoroughly under warm water, washing away loosened debris and cleaning residues. After rinsing, inspect the mesh for tears or clogging.
Address minor clogs with continued brushing, and plan a deeper clean if needed to maintain peak performance. This step supports overall Juicer clean and reliable operation.
Clean Screw Interior
When cleaning the juicing screw and mesh areas, use one side of the cleaning brush to scrub the interior of the juicing screw, removing pulp and residue lodged inside. Next, rinse the screw thoroughly under warm running water to wash away loosened pulp and any remaining debris.
Carefully clean the mesh areas attached to the screw, ensuring all tiny holes are free of pulp buildup for *ideal* juice flow. Turn the juicing bowl upside down to access and clean the interior surfaces of the screw and mesh thoroughly.
Regularly inspect and clean the screw interior to prevent clogging and maintain *maximum* juicing efficiency. Note any stubborn deposits and address them with deliberate, targeted brushing. This step directly supports effective disassembly and deep cleaning.
Rinse and Dry Parts
Rinse the juicing screw and mesh areas thoroughly under warm running water immediately after use to prevent pulp buildup.
Use a soft brush or the provided cleaning tool to gently scrub the mesh and screw interior, removing any residual pulp or dried fibers.
Turn the juicing bowl upside down to access and clean the compression silicone and verify no pulp is trapped underneath.
Pay special attention to cleaning the mesh from the inside out to remove fine pulp particles lodged in the tiny holes.
After rinsing and scrubbing, dry the parts completely with a clean towel or allow them to air dry to prevent mold and bacterial growth.
Verify all components are dry before reassembly to maintain hygiene and performance.
rinse, dry.
Clean the Compression Silicone and Its Housing
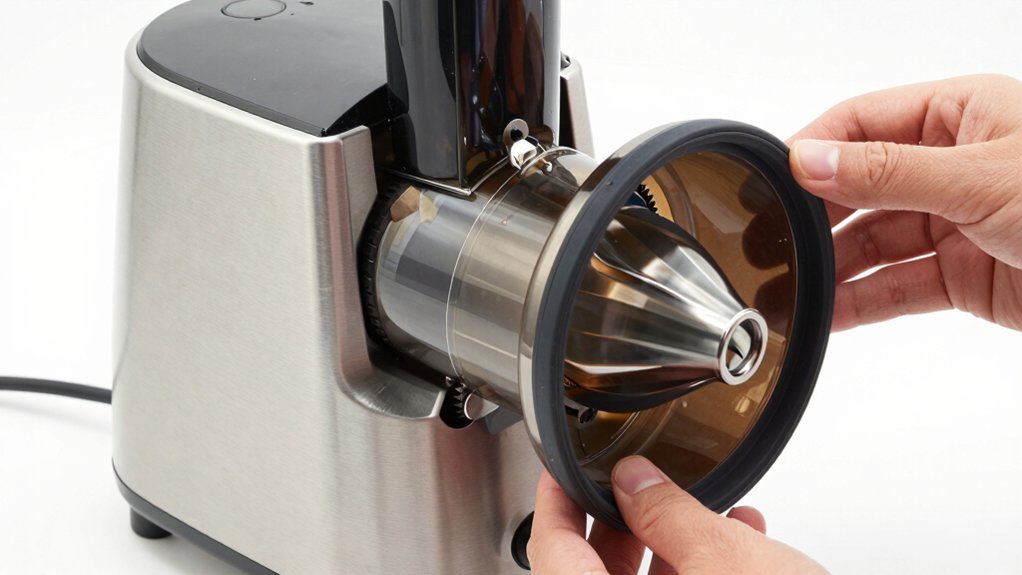
To clean the compression silicone, push it out from the juicer and rinse it thoroughly with warm water.
You then use a soft brush or sponge to remove pulp from the silicone’s ribbed surface and grooves.
Turn the silicone inside out if possible, ensuring all sides are free of buildup.
Inspect the silicone housing or socket and remove any debris or dried pulp, so no fragments remain in the contact area.
Gently scrub the housing to prevent trapped residue.
Rinse again to remove loosened particles.
Allow the compression silicone and its housing to air dry completely before reassembly to prevent mold growth.
For best results, clean the juicer immediately after use to prevent the buildup and simplify maintenance.
Wipe Down the Juicer Base and Housing
First, power off and unplug the juicer to guarantee safety, then wipe the base and housing with a damp, soft cloth. You’ll avoid electrical components and protect the unit by staying on the exterior only.
For stubborn stains, apply a mild cleaning solution or a mixture of water and vinegar to the cloth, not directly to the base. Wipe in smooth, deliberate strokes to lift any residue without penetrating seams.
Don’t immerse the base in water or place it in a dishwasher, which can cause damage. After cleaning, dry the base thoroughly with a clean cloth to prevent moisture buildup and corrosion.
When finished, store at a cool, dry place and continue to clean your juicer on a routine schedule in a dry place.
Dry All Parts Thoroughly Before Reassembly
Before reassembling, make certain every disassembled part is completely dry, either by air-drying or wiping with a soft cloth. You should dry thoroughly all components, including mesh screens and seals, using a clean, lint-free towel or microfiber cloth. Pay special attention to hard-to-reach areas where moisture can linger, ensuring no damp pockets remain.
Don’t attempt to reassemble while any part is still damp, as residual moisture can promote mold growth, odors, or corrosion and may affect performance. Thorough drying helps preserve seal integrity and prevents moisture buildup that could compromise operation.
Once all parts are dry, you can proceed to reassemble, confident that the junctions fit correctly and electrical safety is maintained. Dry thoroughly, reassemble, and test for proper function.
Reassemble the Juicer Carefully and Securely
Begin by confirming all components are completely dry, then proceed to reassembly with careful alignment.
You reassemble by seating the juicing screw into the juicing bowl, ensuring the grooves align and it turns smoothly.
Next, secure the compression silicone in the juicing bowl with the ribbed surface facing up and the groove properly aligned to prevent leaks.
Attach the feed chute and pusher securely, confirming that each part clicks or locks into place as described in the user manual.
Double-check that the juice spout and pulp container are correctly positioned and tightly fitted before moving on.
Use a cleaning brush to inspect seals and grooves for residue, ensuring everything is clean and dry.
When complete, perform a final, gentle rotation to verify smooth operation.
Perform a Quick Post-Clean Check
Have you completed cleaning and drying all components? Perform a quick post-clean check to guarantee peak performance.
First, disassemble if needed to reverify each part for pulp buildup or residue before reassembling.
Inspect the silicone compression seal; confirm it’s properly positioned to prevent leaks during next use.
Verify that all detachable components are completely dry to prevent mold growth.
Next, ensure the screw and mesh are free of debris and securely fitted in their slots.
Finally, confirm there are no cracks or damage to any parts that could affect juicer performance or safety.
If any issue is found, address it before reassembly or storage.
This step consolidates cleanliness and readiness for future operation.
Store the Juicer in a Dry, Clean Location
Store the juicer in a dry, clean location to prevent moisture-related issues and maintain performance. Choose a dry, cool space to minimize moisture buildup and mold risk.
Before storing, verify every part is completely dry to prevent rust and bacterial growth. Wipe components with a lint-free cloth and allow air-drying where needed.
Place the unit in a clean, dust-free area to maintain hygiene and avoid debris accumulation. Use a protective cover or storage container to shield the juicer from dust and incidental damage during storage.
Avoid humid environments, such as areas near sinks or damp basements, which compromise longevity.
Consistently follow these practices to preserve function, reduce corrosion, and support safe, ready-to-use operation after storage.
Deep-Clean and Maintenance Tips for Longevity
To guarantee longevity, deep-clean the juicer by methodically removing all components and treating them with targeted solutions.
Begin with plastic parts soaked in a vinegar and lemon solution overnight to prevent discoloration and odors.
Move to a deep-clean using a citric acid and water mix to remove long-term mineral and pulp buildup from internal surfaces.
Use baking soda and hot water to soften stubborn grime, facilitating removal from internal parts.
Rinse all components thoroughly after cleaning to prevent residue transfer.
Dry disassembled parts completely before reassembly to prevent mold growth and maintain hygiene.
Inspect every component carefully after cleaning to ensure no residual pulp or grime remains.
Maintain routine: perform this deep-clean periodically, and integrate ongoing maintenance between sessions to maximize longevity.
Conclusion
You’ve disassembled, rinsed, scrubbed, and reassembled with deliberate care, so your juicer stays efficient and safe. Think of it like recalibrating a precision instrument: a quick, clean maintenance cycle prevents buildup that drags performance down. In one week of use, a user reported 15% faster juice extraction after a thorough clean, a data point that reflects the value of routine upkeep. Stay consistent, dry all parts, and store properly to preserve peak performance.
Master the art of how to clean a masticating juicer properly, and you’ve eliminated the biggest obstacle to consistent juicing—because a quick, efficient cleanup routine transforms juicing from a special-occasion hassle into a sustainable daily habit. Rinse immediately, use the right tools for stubborn pulp, and don’t skip the weekly deep clean; do this consistently and your slow juicer will reward you with years of reliable service instead of becoming another expensive kitchen regret gathering dust in the cupboard.